- Language
Intelligent Monitor system
Wall-Mounted Network Rack: Comprehensive Guide to Selection, Installation & Maintenance
1. Introduction to Wall-Mounted Network Racks
A wall-mounted network rack is a specialized storage solution designed to house and organize network equipment (such as switches, routers, patch panels, and access points) by mounting directly on walls. Unlike floor-standing racks, these compact units are ideal for environments with limited space—including small offices, server rooms with constrained square footage, retail stores, and remote network closets. Their space-saving design not only optimizes vertical storage but also facilitates better cable management, equipment cooling, and easy access for maintenance, making them a staple in modern network infrastructure setups.
Key advantages of wall-mounted network racks include: space efficiency (eliminating the need for floor space), improved equipment security (many models feature lockable doors to prevent unauthorized access), enhanced cable organization (built-in cable management slots and理线环 reduce clutter), and flexible installation (adaptable to various wall types and room layouts). Whether for a small business’s basic network setup or a large enterprise’s distributed edge computing nodes, wall-mounted racks offer a scalable and practical solution for equipment housing.
2. Key Factors for Selecting a Wall-Mounted Network Rack
2.1 Rack Size & U Height
The "U" (unit) height is the standard measurement for network rack size, with 1U equal to 1.75 inches (44.45mm). Wall-mounted racks typically range from 2U to 24U, depending on the volume of equipment to be installed. For small-scale setups (e.g., a home office or a small retail store with 1-2 switches and a router), a 2U-6U rack is sufficient. For larger edge deployments or multi-device setups (e.g., a branch office with patch panels, PoE switches, and a firewall), an 8U-24U rack may be necessary.
Additionally, consider the depth of the rack—ensure it can accommodate the longest piece of equipment (e.g., some enterprise-grade routers or switches have greater depth than consumer-grade models). Common depths for wall-mounted racks range from 12 inches to 36 inches; measure your equipment’s depth beforehand to avoid compatibility issues.
2.2 Load Capacity
Load capacity refers to the maximum weight the rack can safely support, a critical factor to prevent wall damage or equipment failure. Wall-mounted racks typically have a static load capacity (weight when the rack is stationary) ranging from 50 lbs to 500 lbs or more. When selecting, calculate the total weight of your equipment (including switches, routers, cables, and accessories) and choose a rack with a load capacity that exceeds this total by 20-30% to account for future expansions or additional equipment.
2.3 Material & Durability
High-quality wall-mounted racks are usually constructed from cold-rolled steel, which offers excellent strength, corrosion resistance, and durability. Steel racks are ideal for industrial environments, server rooms, or areas with high humidity. For lighter-duty applications (e.g., home offices), aluminum racks are also available—they are lighter in weight but have lower load capacity compared to steel. Additionally, look for racks with a powder-coated finish, which provides an extra layer of protection against scratches and rust.
2.4 Security Features
To protect sensitive network equipment from theft or unauthorized access, choose a wall-mounted rack with built-in security features. Common security options include lockable front and rear doors (using key locks or combination locks), side panels (to prevent access from the sides), and cable entry points with covers (to secure cable connections). For environments with strict security requirements (e.g., financial institutions or government offices), consider racks with tamper-evident locks or integration with access control systems.
2.5 Summary of Cable Management Requirements for Rack Selection
When selecting a wall-mounted network rack, cable management functionality is a core consideration. Prioritize racks with integrated features such as cable management arms, cable rings/cleats, built-in patch panels, and grommeted cable entry/exit slots. These features lay the foundation for organized cable routing, separation of power and data cables (to avoid EMI), and protection of cables from abrasion. Racks with removable side panels or rear access doors are also preferred, as they facilitate flexible cable routing from multiple angles, which is essential for efficient cable management during and after installation.
3. Step-by-Step Installation Guide for Wall-Mounted Network Racks
3.1 Preparation & Safety Precautions
Before installation, gather the necessary tools and materials: wall-mounted network rack, mounting brackets, screws, anchors (appropriate for your wall type—drywall, concrete, brick, etc.), a level, a drill, a screwdriver, a tape measure, and a stud finder (for drywall installations). Additionally, ensure you have a helper to assist with lifting the rack (especially larger models) to avoid injury.
Safety precautions: Turn off power to any nearby electrical outlets or circuits to prevent electric shock. Verify the wall’s load-bearing capacity—avoid mounting the rack on weak walls (e.g., drywall without studs) that cannot support the rack’s weight plus the equipment. If mounting on concrete or brick walls, use masonry anchors designed for heavy loads.
3.2 Choosing the Installation Location
Select a location that meets the following criteria: (1) Sufficient space around the rack (at least 12 inches of clearance on the front and rear for equipment access and ventilation); (2) Away from heat sources (e.g., radiators, air conditioners) or moisture sources (e.g., windows, water pipes) to prevent equipment damage; (3) Close to power outlets and network cabling to minimize cable runs; (4) At a height that allows easy access to equipment (typically 4-6 feet from the floor).
3.3 Mounting the Rack to the Wall
Use a stud finder to locate wall studs (for drywall installations). Mark the stud positions with a pencil—this is where you will attach the mounting brackets (studs provide the strongest support for heavy racks).
Hold the rack’s mounting brackets against the wall, aligning them with the marked stud positions. Use a level to ensure the brackets are straight, then mark the screw holes on the wall.
Drill pilot holes into the marked positions (use a drill bit slightly smaller than the screws for a tight fit). For concrete/brick walls, drill holes using a masonry drill bit, then insert masonry anchors into the holes.
Attach the mounting brackets to the wall using the appropriate screws and anchors. Tighten the screws securely to ensure the brackets are firmly fixed.
Lift the network rack (with helper assistance) and align it with the mounted brackets. Secure the rack to the brackets using the provided bolts or screws, tightening them evenly to distribute the weight.
Use a level again to verify that the rack is straight and level. Adjust if necessary by loosening the screws slightly, repositioning the rack, and retightening.
3.4 Installing Equipment
Install equipment in the rack using rack screws and cage nuts (most racks come with these accessories). Start with heavier equipment at the bottom of the rack to lower the center of gravity and improve stability.
Connect the equipment to power and network sources, then test each device to ensure it is functioning properly.
4. Comprehensive Network Cable Management Guide
4.1 Core Principles of Network Cable Management
Effective network cable management adheres to three core principles: organization (for easy maintenance and traceability), interference prevention (to ensure stable network performance), and cable protection (to extend cable lifespan). For wall-mounted rack setups, these principles translate to structured routing, strict separation of power and data cables, proper cable bundling, and adherence to cable bend radius requirements—especially for high-speed or fiber optic cables.
4.2 Step-by-Step Cable Routing for Wall-Mounted Racks
Implement a structured cable routing plan to avoid tangles and interference:
Separate Cable Types: Route data cables (Ethernet, fiber) and power cables through separate channels or compartments. Never bundle them together, as this can cause electromagnetic interference (EMI) that degrades network speed and reliability.
Use Management Accessories: Utilize cable management arms for patch cords connecting equipment front ports—these arms allow flexible movement when accessing equipment without straining cables. For vertical runs, secure cables to cable rings or cleats at 12-18 inch intervals to prevent sagging.
Protect Cable Ends: Pass cables through grommeted entry/exit slots to avoid abrasion from sharp metal edges of the rack. For fiber optic cables, use specialized fiber management accessories (e.g., fiber spools, slack management trays) to maintain the proper bend radius (typically 10-15 times the cable diameter) and prevent permanent signal loss.
4.3 Bundling & Labeling Best Practices
Neat bundling and clear labeling are critical for traceability and long-term maintenance:
Choose the Right Bundling Tool: Use reusable Velcro straps instead of zip ties. Velcro straps can be adjusted without cutting, reducing the risk of cable damage and simplifying future modifications. Bundle cables into groups of 4-6 to avoid over-bundling, which traps heat and causes interference.
Label Thoroughly: Apply clear, durable labels to both ends of each cable. Include key details such as source device, destination port, and cable type (e.g., "Router LAN 1 to Switch Port 5, Cat6"). Label patch panel ports to correspond with connected devices or workspaces.
Use Color Coding: Consider color-coded cables or labels (e.g., blue for data, red for power, yellow for fiber) to simplify quick identification and reduce troubleshooting time.
5. Maintenance Tips for Wall-Mounted Network Racks
Regular Inspection: Conduct monthly inspections to check for loose screws (on the rack, brackets, and equipment), signs of corrosion or damage, and cable wear. Tighten any loose components and replace damaged cables or hardware promptly.
Ventilation & Cooling: Ensure the rack’s vents are not blocked by cables or other objects—proper airflow is critical to prevent equipment overheating. For racks with multiple heat-generating devices (e.g., PoE switches), consider adding a rack-mounted fan or cooling unit.
Cable Management Upkeep: Conduct quarterly cable audits to maintain organization. Reorganize any tangled or displaced cables, replacing worn Velcro straps or damaged labels as needed. Remove unused or obsolete cables (e.g., old patch cords, retired equipment connections) to reduce clutter, improve airflow, and free up management space for future expansions. Inspect cables for signs of wear, such as frayed jackets or loose connectors—replace damaged cables promptly to avoid signal issues or short circuits. For high-traffic racks, consider refreshing cable labels annually to ensure legibility, especially in environments with dust or humidity.
Security Checks: Verify that lockable doors and panels are functioning properly, and replace lost or damaged keys promptly. Restrict access to the rack to authorized personnel only.
Load Capacity Monitoring: When adding new equipment, ensure the total weight does not exceed the rack’s load capacity. Avoid overloading the rack, as this can strain the wall mounting and lead to structural damage.
6. Common Mistakes to Avoid
Underestimating Load Capacity: Choosing a rack with insufficient load capacity can lead to wall damage, rack failure, or equipment injury. Always calculate the total equipment weight and select a rack with a safety margin.
Mounting on Weak Surfaces: Avoid mounting heavy racks on drywall without studs, as this can cause the rack to pull away from the wall. Use appropriate anchors for non-stud installations (e.g., toggle bolts for drywall) only for lighter racks.
Poor Cable Management: Tangled, unorganized, or over-bundled cables create multiple issues: they block critical airflow (contributing to equipment overheating), increase the risk of EMI (degrading network speed and reliability), make troubleshooting and maintenance time-consuming (difficult to trace specific connections), and can lead to accidental cable pulls or damage. Overlooking cable bend radius (especially for fiber optics) can cause permanent signal loss, while unlabeled cables may result in incorrect disconnections during maintenance. Invest time in structured routing, bundling, and labeling during installation to avoid these pitfalls.
Inadequate Ventilation: Placing the rack in a confined space or blocking vents can lead to equipment overheating, which reduces performance and shortens lifespan.
Ignoring Security: Leaving the rack unlocked or accessible to unauthorized personnel increases the risk of theft or tampering with sensitive network equipment.
7. Integration of Intelligent Monitor Systems with Wall-Mounted Network Racks
7.1 Overview of Intelligent Monitor Systems for Network Racks
An intelligent monitor system for network racks is a sophisticated solution designed to real-time track and manage the operational status of rack-mounted equipment, environmental conditions, and physical security. Integrated with wall-mounted network racks, this system provides centralized visibility into key metrics, enabling proactive maintenance, rapid fault diagnosis, and enhanced overall network reliability. Typical components of an intelligent monitor system include sensors (for temperature, humidity, power, and vibration), cameras (for physical security monitoring), a central control unit, and a remote management platform (cloud-based or on-premises).
The core value of integrating an intelligent monitor system lies in transforming passive rack management into active oversight. It eliminates the need for manual on-site inspections, reduces the risk of unplanned downtime caused by equipment overheating, power failures, or environmental anomalies, and simplifies the management of distributed rack deployments (e.g., multiple branch office racks).
7.2 Key Functions of Intelligent Monitor Systems
Environmental Monitoring: Real-time monitoring of temperature and humidity within the rack and surrounding area. Most systems trigger automatic alerts (via email, SMS, or platform notifications) when values exceed preset thresholds (e.g., temperature above 35°C or humidity below 20%/above 80%), preventing equipment damage from extreme conditions.
Equipment Status Monitoring: Tracking the operational status of rack-mounted devices (switches, routers, etc.) by monitoring power supply, port connectivity, and performance metrics (e.g., CPU utilization, bandwidth usage). The system can detect abnormal conditions such as power outages, port disconnections, or performance bottlenecks and notify administrators immediately.
Physical Security Monitoring: Integration with IP cameras or motion sensors to monitor access to the wall-mounted rack. When unauthorized access is detected (e.g., forced door opening, movement in restricted areas), the system triggers alarms and records video footage for later review. Some advanced systems also support access control integration, allowing only authorized personnel to unlock the rack via biometrics or RFID cards.
Remote Management & Automation: Through a cloud-based platform, administrators can remotely view real-time data, review historical logs, and even execute basic control commands (e.g., remotely restarting a faulty device, adjusting cooling equipment). Automation features enable preset responses to specific events, such as activating a rack-mounted fan when temperature rises or shutting down non-critical equipment during power fluctuations.
7.3 Installation & Integration Tips for Wall-Mounted Racks
When integrating an intelligent monitor system with a wall-mounted network rack, follow these key steps to ensure seamless operation:
Select Compatible Components: Choose a monitor system that matches the size and load capacity of the wall-mounted rack. Opt for compact sensors and control units to avoid occupying excessive rack space (critical for small 2U-6U wall-mounted racks). Ensure that the system’s power requirements are compatible with the rack’s power supply setup.
Strategic Sensor Placement: Install temperature and humidity sensors at key locations within the rack—avoid placing them near heat-generating equipment (e.g., PoE switches) to ensure accurate readings. Power sensors should be connected to the rack’s power distribution unit (PDU) to monitor the total power consumption of all devices. Vibration sensors (if needed) should be mounted on the rack frame to detect abnormal shaking (e.g., from accidental impacts).
Cable Routing for Monitor Components: Route the cables of sensors, cameras, and control units through the rack’s cable management system (cable arms, rings, or slots). Separate monitor system cables from data and power cables to avoid EMI interference. Use labeled and color-coded cables to simplify identification and maintenance.
Central Control Unit Installation: Mount the central control unit in a easily accessible position within the rack (preferably at the middle or upper section) to facilitate wiring and future maintenance. Ensure the unit has adequate ventilation to prevent overheating, as it processes and transmits real-time data continuously.
Platform Configuration & Testing: After hardware installation, configure the remote management platform by setting up alert thresholds, user permissions, and data logging parameters. Conduct comprehensive testing of all functions—verify that sensors transmit accurate data, alerts are triggered correctly, and remote commands are executed properly.
Calibrate sensors quarterly to ensure accurate data collection, especially temperature and humidity sensors.
Check the connectivity of the central control unit and remote platform regularly to avoid data loss due to network issues.
Update the system firmware and platform software periodically to fix bugs, improve performance, and add new features.
Inspect the physical condition of sensors, cameras, and cables—replace any damaged components promptly to avoid monitoring blind spots.
-
-
-
-
-
-
-
-

-
-

Network Patch Cord Cat8
Oct 23, 202592
-
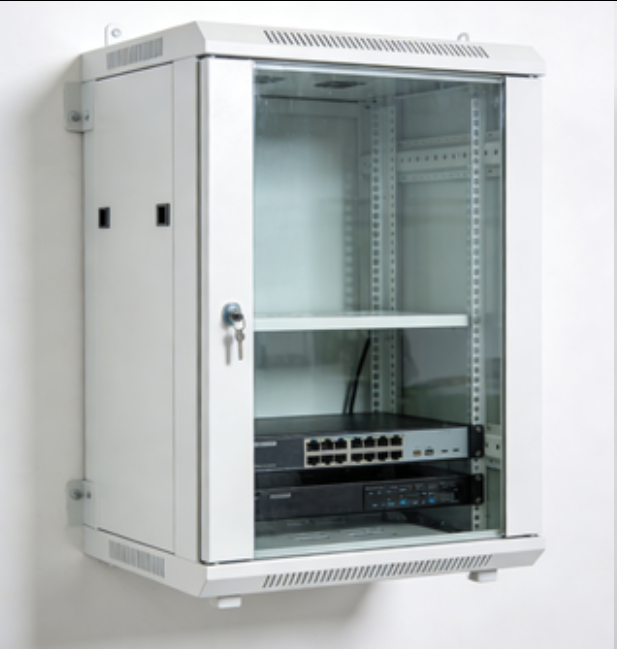
Network Rack Wall Mount with Glass Door
Jan 07, 202679
-
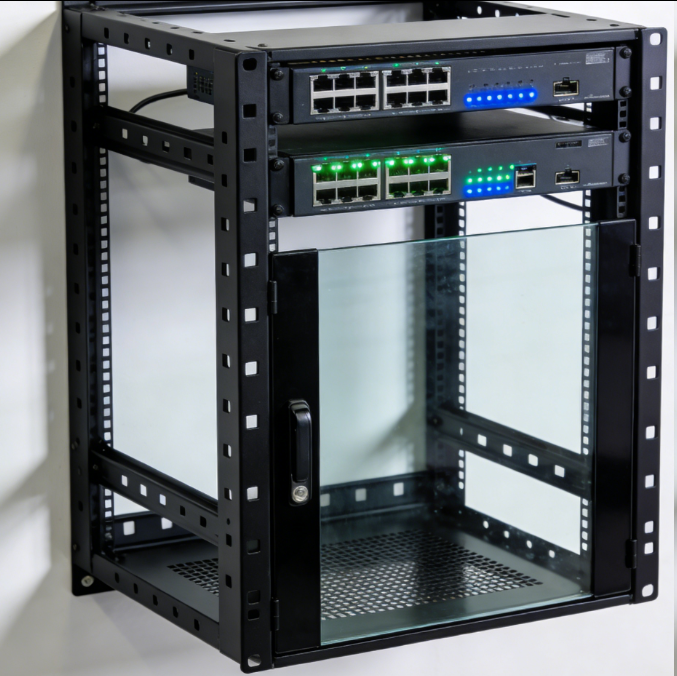
Network Rack Wall Mount 9U
Jan 06, 202675
-

Network Cable Management Tray
Oct 30, 202573
-
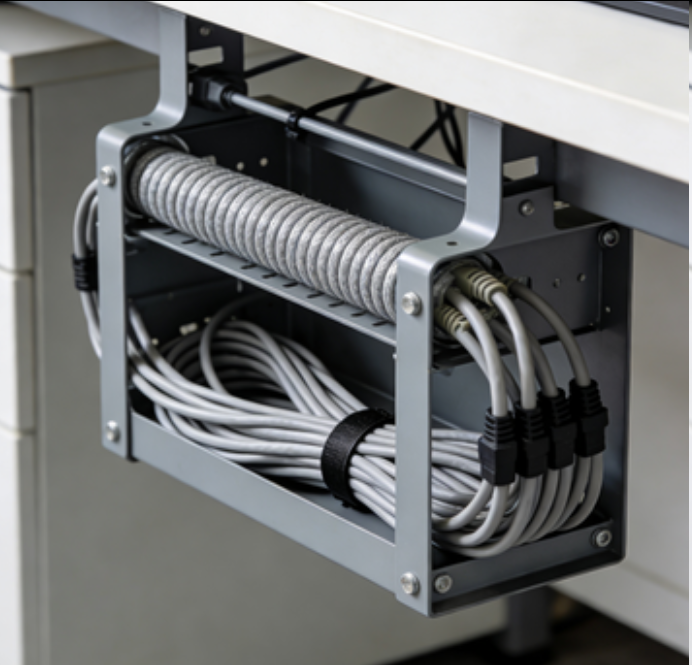
Network Cable Management Under Desk
Dec 25, 202572